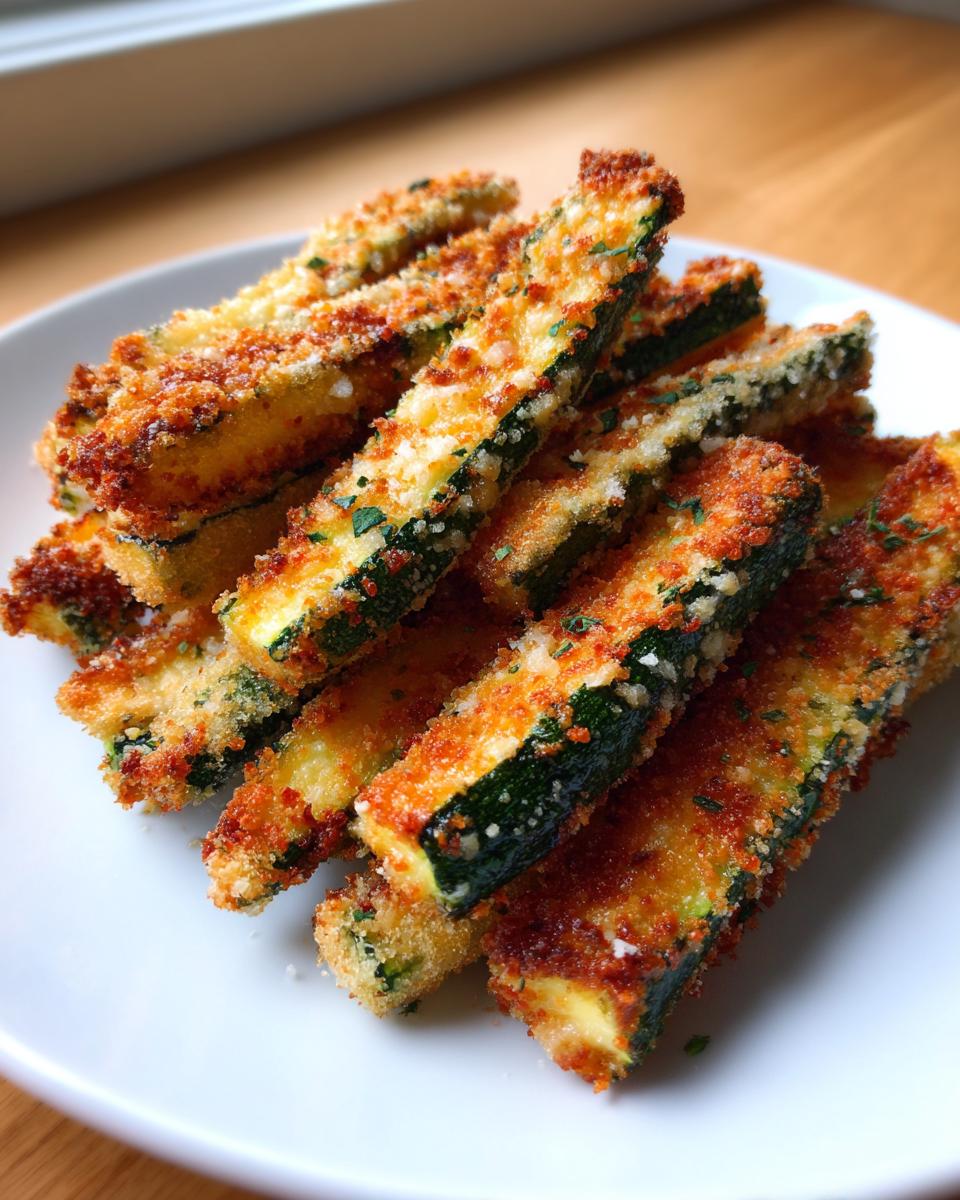
You know those days when you’re craving something crunchy and salty, but you don’t want to feel guilty afterward? That’s exactly how I discovered these crispy baked zucchini fries! I was staring at a pile of zucchinis from my garden (okay fine, the farmer’s market), wondering how to make them exciting. After some delicious trial and error, I landed on this magic combination: golden breadcrumbs, a hint of Parmesan, and just the right amount of oven time. The result? Fries so crispy you’ll swear they’re fried, but with all the goodness of fresh zucchini. And the best part? My kids actually fight over them – veggies have never disappeared so fast from our plates!
Why You’ll Love These Crispy Baked Zucchini Fries
Listen, I know what you’re thinking—”veggie fries” sounds like a compromise, but trust me, these are a game-changer. Here’s why:
- They’re sneaky healthy – All that crispy satisfaction without the deep-fried guilt (but shhh, no one needs to know they’re good for you)
- Ready in 30 minutes flat – From fridge to table faster than pizza delivery shows up
- That CRUNCH factor – The perfect golden crust gives you that fry experience with every bite
- Kids actually eat them – I’ve seen picky eaters devour these like candy (my greatest kitchen victory)
Seriously, these fries turn zucchini haters into believers—I’ve converted three neighbors already this summer!
Ingredients for Crispy Baked Zucchini Fries
Here’s everything you’ll need to make magic happen – I promise it’s all simple stuff you probably have already! Just wait until you see how these basic ingredients transform into something extraordinary.
- 2 medium zucchinis (look for firm ones – no mushy spots! Cut them into fry-sized sticks about 3 inches long and ½ inch thick)
- ½ cup breadcrumbs (go for panko if you want EXTRA crunch – it makes all the difference)
- ¼ cup grated Parmesan cheese (the powdery kind mixes best, but hey – use what you’ve got)
- ½ teaspoon garlic powder (trust me, this little bit adds so much flavor)
- ½ teaspoon paprika (smoked paprika is my secret weapon when I’m feeling fancy)
- ¼ teaspoon salt (I use coarse kosher salt – adjust to your taste)
- ¼ teaspoon black pepper (freshly cracked if you’ve got it)
- 1 large egg (this is our glue – make sure it’s room temp)
- 1 tablespoon olive oil (just enough to help them crisp up beautifully)
See? Nothing weird or complicated. The beauty of this recipe is how everyday ingredients team up to create something way better than the sum of its parts!
How to Make Crispy Baked Zucchini Fries
Okay, let’s get down to business! Making these zucchini fries is seriously easy, but I’ve got a few tricks up my sleeve to guarantee that perfect crispiness every time. Follow these steps and you’ll be snacking in no time!
Step 1: Prep the Zucchini
First things first – grab those zucchinis and give them a good wash. No need to peel them (the skin adds nice texture and nutrients!). Now, here’s my golden rule: cut them into even sticks about the size of fast food fries – think 3 inches long and ½ inch thick. Why so precise? Because uniform sizes mean they’ll all cook at the same rate. Nothing worse than some fries turning to mush while others are still raw in the middle!
Pro tip: If your zucchini is super watery, pat the sticks dry with a paper towel. Less moisture = better crisp factor!
Step 2: Coat the Zucchini
This is where the magic happens! Set up your breading station like a pro:
- Whisk that egg in a shallow bowl until it’s nice and smooth (I like to add a tiny splash of water to thin it out just a bit)
- In another bowl, mix together your breadcrumbs, Parmesan, and all those yummy spices – really get in there with your fingers to distribute everything evenly
Now for the fun part: dip each zucchini stick in the egg, let the excess drip off, then roll it in the breadcrumb mixture. Press gently to make sure every nook and cranny gets coated – this is what gives you that amazing golden crust! I usually do one hand for wet ingredients and one for dry to avoid breadcrumb fingers (you’re welcome for that tip!).
Step 3: Bake to Perfection
Here’s where patience pays off! Arrange your coated zucchini fries on the prepared baking sheet in a single layer – no crowding! They need their personal space to crisp up properly. Drizzle lightly with olive oil (this is the secret to that golden color).
Pop them in your preheated 425°F oven and set your timer for 10 minutes. When it dings, carefully flip each fry (tongs work great here) – this ensures even browning on all sides. Bake for another 10 minutes until they’re gorgeously golden and crispy. You’ll know they’re done when they look like they belong in a gourmet restaurant!
Important: Let them cool for just a minute or two before serving – that’s when they get their final crisp. But don’t wait too long… these babies are best enjoyed piping hot!
Tips for the Crispiest Baked Zucchini Fries
After making these zucchini fries more times than I can count (my family’s obsessed!), I’ve learned all the little tricks that take them from good to oh-my-goodness incredible. Here are my battle-tested secrets:
Parchment paper is your best friend – I learned this the hard way after scraping off stuck fries one too many times. A parchment-lined baking sheet guarantees easy flipping and prevents any sad, torn crusts. Bonus? Cleanup takes two seconds!
Give them breathing room – I know it’s tempting to cram them all on one tray, but trust me, overcrowding leads to steamed zucchini instead of crispy fries. If they’re not sizzling in their own space, they won’t crisp up right. Use two pans if you need to!
The flip is everything – Set that timer religiously for the 10-minute mark. That mid-bake flip isn’t just for looks – it ensures every side gets golden and crispy. I use kitchen tongs and pretend I’m a short-order cook flipping burgers!
Serve them HOT – These fries are like theater popcorn – absolute perfection for about 7 minutes after they come out of the oven. The crunch factor diminishes fast, so have your dipping sauces ready and eat them immediately. (No shame in eating them straight off the pan – I won’t tell!)
Serving Suggestions for Crispy Baked Zucchini Fries
Now that you’ve got these gorgeous golden fries ready, let’s talk about how to serve them up in style! I’ve tried every possible combination in my kitchen, and these are the pairings that always get the biggest cheers from my family:
The classic dipping duo – Marinara sauce (I warm up my favorite pasta sauce) and cool ranch dressing create the perfect yin-yang of flavors. For an extra kick, I’ll stir some garlic powder and fresh herbs into the ranch. My kids call this “fancy sauce” and beg for it weekly!
Burgers’ best friend – These fries are the ideal side when we’re grilling. Stack up some juicy cheeseburgers, open a bag of chips (okay, maybe not after all this healthy effort), and watch these zucchini fries disappear faster than the burgers. They’re especially good with turkey burgers – the lightness pairs perfectly.
Salad upgrade – Crumble leftover fries over a big Greek salad for the most amazing crunchy topping. The warm zucchini, cool veggies, and tangy feta create this magical contrast that makes lunch feel like a restaurant meal. Bonus: it’s a great way to use any fries that didn’t get eaten immediately (though in my house, that’s rare)!
Honestly? Half the time we don’t even bother with plates – I’ll just set the baking sheet in the middle of the table with all the dipping sauces and watch the feeding frenzy begin. What can I say? When veggies taste this good, table manners go out the window!
Storage and Reheating
Okay, let’s be real—these zucchini fries are absolute perfection fresh from the oven, but life happens, and sometimes you end up with leftovers (though in my house, that’s a rare miracle!). Here’s how to handle them like a pro:
Storing leftovers: If by some chance you have leftovers, let them cool completely first (no steam trapped in that container!). I tuck mine into an airtight container with a paper towel underneath to soak up any moisture. They’ll keep in the fridge for 1-2 days, though the texture starts to suffer after that first day.
The great reheating debate: Your toaster oven or air fryer is your best bet for reviving that crispiness—just 3-4 minutes at 375°F usually does the trick. The microwave? Don’t even think about it unless you want soggy zucchini sticks (learned that one the hard way!). If you’re using a regular oven, spread them on a rack over a baking sheet at 400°F for about 5 minutes.
My honest advice? These are truly at their peak right after baking, so I always plan to make just what we’ll eat. When I’m meal prepping, I’ll prep the zucchini sticks and breading mixture separately, then coat and bake them fresh when we’re ready. The difference is night and day—that first magical crunch is worth the extra few minutes!
P.S. If your “leftovers” are just a few sad, soggy sticks the next day? Toss them into scrambled eggs or a frittata—they make an awesome texture surprise in your morning omelet!
Nutritional Information
Okay, let’s talk numbers – but first, my standard disclaimer: these are estimates based on my exact ingredients, and your results might vary slightly depending on your zucchini size or how heavy-handed you are with that delicious Parmesan! (No judgment here – I’ve been known to “accidentally” double the cheese.)
Here’s the breakdown per serving (about ¼ of the recipe, which in my house means one very generous handful):
- Calories: 120 (way better than regular fries!)
- Fat: 5g (mostly the good kind from olive oil and Parmesan)
- Carbs: 12g (with 2g of fiber from the zucchini – bonus!)
- Protein: 6g (thank you, egg and cheese!)
- Sodium: 250mg (easy to reduce if you’re watching salt – just go lighter on the seasoning)
What I love most? You’re getting a full serving of veggies in something that tastes like a treat. My nutritionist friend pointed out that zucchini is packed with vitamin C, potassium, and antioxidants – but honestly, I just care that my kids are eating vegetables without realizing it! The breadcrumbs add just enough carbs to make them satisfying, while the egg and cheese give them some staying power.
Remember, these numbers can change if you tweak the recipe – using almond flour instead of breadcrumbs? Different cheese? More or less oil? It all affects the final count. But no matter how you slice it (or fry it!), you’re making a way healthier choice than traditional fries. Now go enjoy that crunch guilt-free!
FAQs About Crispy Baked Zucchini Fries
After making these zucchini fries for years (and fielding texts from friends who tried my recipe), I’ve heard every question under the sun! Here are the answers to the most common zucchini fry dilemmas:
Can I make these in an air fryer? Absolutely! The air fryer is my secret weapon for extra crispiness. Just cook at 400°F for about 10-12 minutes, shaking the basket halfway. They come out even crispier than oven-baked – just don’t overcrowd the basket or they’ll steam instead of crisp.
Why are my zucchini fries soggy? Oh honey, I’ve been there! Usually it’s one of three things: 1) You didn’t pat the zucchini dry enough before coating (water is the enemy of crisp!), 2) The fries were too crowded on the pan, or 3) You skipped flipping them halfway. My grandma always said “oven fries need their space and attention!”
Can I prep these ahead of time? You bet! I often prep the zucchini sticks and breading mixture separately in the morning, then just do the egg wash and coating right before baking. If you coat them too early, the breadcrumbs get soggy – learned that the messy way during a dinner party!
What’s the best substitute for breadcrumbs? Panko is my top choice for crunch, but crushed cornflakes or almond flour work great too (especially for gluten-free). One time I even used crushed pork rinds for a keto version – shockingly delicious, though my Italian grandma would faint at the idea!
How do I get the coating to stick better? The egg wash is key – make sure each stick gets fully coated before breading. Some folks swear by dipping in flour first, but I find that overcomplicates things. If your coating’s falling off, you might need to press it on more firmly or check your zucchini isn’t too wet.
Still have questions? Message me @mykitchen – I’ve made every mistake so you don’t have to! Nothing makes me happier than seeing your crispy zucchini fry successes (or hilarious fails – we’ve all been there).
Ready to Make Crispy Baked Zucchini Fries?
Alright, my crispy-craving friend – you’ve got all the secrets now! I can practically hear your oven preheating already. Don’t be surprised if these become your new obsession – they’ve totally replaced regular fries in my house (and that’s saying something!). The best part? You’re just 30 minutes away from veggie magic.
I want to hear all about your zucchini fry adventures! Did you go crazy with the Parmesan like I do? Discover a genius new dipping sauce? Have a kitchen fail that made you laugh? Share your stories with me – the good, the bad, and the crispy. Tag me @mykitchen or use #crispyzucchinimagic so I can cheer you on! You can also find more delicious recipes and inspiration on Pinterest.
Now go forth and bake! And remember my golden rule: eat them while they’re hot enough to burn your fingers (just a little). That first crunchy bite? Pure happiness. Let me know how yours turn out – happy baking!
Print
30-Minute Crispy Baked Zucchini Fries You’ll Crave 40-LOVE THESE Healthy Crispy Baked Zucchini Fries Never Soggy Crispy Baked Zucchini Fries in 30 Minutes Irresistible Crispy Baked Zucchini Fries in Just 30 Minutes
- Total Time: 30 minutes
- Yield: 4 servings 1x
- Diet: Vegetarian
Description
Crispy baked zucchini fries are a healthy snack or side dish. They are easy to make and packed with flavor.
Ingredients
- 2 medium zucchinis
- 1/2 cup breadcrumbs
- 1/4 cup grated Parmesan cheese
- 1/2 teaspoon garlic powder
- 1/2 teaspoon paprika
- 1/4 teaspoon salt
- 1/4 teaspoon black pepper
- 1 large egg
- 1 tablespoon olive oil
Instructions
- Preheat oven to 425°F (220°C). Line a baking sheet with parchment paper.
- Cut zucchinis into fry-sized sticks.
- In a bowl, mix breadcrumbs, Parmesan, garlic powder, paprika, salt, and pepper.
- Beat the egg in a separate bowl.
- Dip each zucchini stick into the egg, then coat with the breadcrumb mixture.
- Place the coated zucchini sticks on the baking sheet.
- Drizzle with olive oil.
- Bake for 20 minutes, flipping halfway, until golden and crispy.
Notes
- For extra crispiness, use panko breadcrumbs.
- Serve with marinara sauce or ranch dressing.
- Best eaten fresh from the oven.
- Prep Time: 10 minutes
- Cook Time: 20 minutes
- Category: Appetizer
- Method: Baking
- Cuisine: American
Nutrition
- Serving Size: 1/4 of recipe
- Calories: 120
- Sugar: 3g
- Sodium: 250mg
- Fat: 5g
- Saturated Fat: 1.5g
- Unsaturated Fat: 3g
- Trans Fat: 0g
- Carbohydrates: 12g
- Fiber: 2g
- Protein: 6g
- Cholesterol: 50mg
Keywords: crispy baked zucchini fries, healthy snack, easy zucchini recipe