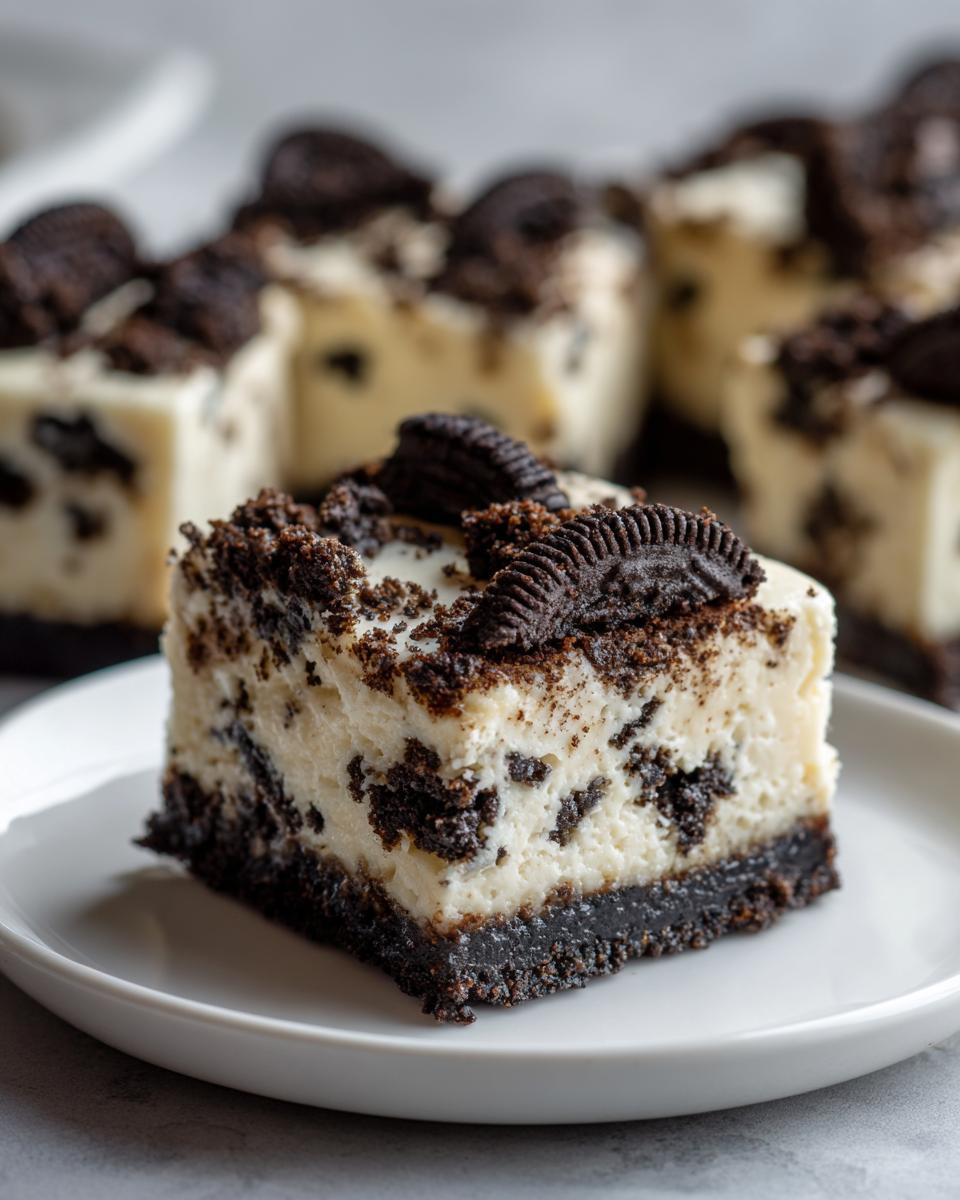
Let me tell you about my secret weapon for last-minute desserts – these no-bake Oreo cheesecake bars that never fail to impress. I’ve been making variations of no-bake cheesecakes for years, but when I first combined crushed Oreos with that creamy filling, it was a total game changer! Picture this: my niece’s birthday party last summer, 90 degrees outside, and me realizing last-minute I’d forgotten to make dessert. Twenty minutes of active work and a few hours in the fridge later, I had a tray of these chocolatey, creamy bars that disappeared faster than the kids could say “seconds please!” No oven needed, minimal effort, maximum deliciousness – that’s what makes these no-bake Oreo cheesecake bars my go-to dessert for any occasion.
Why You’ll Love These No-Bake Oreo Cheesecake Bars
Trust me, once you try these, you’ll be hooked—here’s why:
- No oven required – Perfect for hot summer days when turning on the stove feels like a crime
- Almost impossible to mess up – Just mix, chill, and devour (my kind of baking!)
- Kid and adult approved – That Oreo crunch with creamy cheesecake? Pure magic
- Looks fancy with zero effort – I’ve fooled many guests into thinking I slaved for hours
Ingredients for No-Bake Oreo Cheesecake Bars
Here’s everything you’ll need to make these irresistible bars – and yes, every single ingredient matters! I learned the hard way that skimping on quality here makes a big difference in the final result.
- 36 Oreo cookies (yes, count them! This makes the perfect crust-to-filling ratio)
- 1/4 cup melted unsalted butter (I use the good European-style stuff – it makes the crust extra rich)
- 16 oz full-fat cream cheese, softened (don’t even think about low-fat – trust me on this)
- 1/2 cup granulated sugar (just scoop and level – no packing needed)
- 2 tsp pure vanilla extract (the real stuff makes all the difference)
- 1 cup heavy whipping cream (cold straight from the fridge)
- 12 Oreo cookies, roughly chopped (for those perfect cookie chunks in every bite)
See? Simple ingredients, but each one plays a crucial role in creating that perfect Oreo-cheesecake harmony we’re after.
Equipment You’ll Need
Gather these trusty tools before you start – I promise you probably already have most of them in your kitchen! Here’s what I always grab when making these no-bake Oreo cheesecake bars:
- 8×8-inch baking pan (my favorite is glass, but metal works too)
- Parchment paper (for easy removal – no stuck crust disasters!)
- Mixing bowls (one large, one medium – I like to keep things organized)
- Hand mixer or stand mixer (though I’ve used a whisk in a pinch)
- Spatula (for scraping every last bit of that delicious filling)
- Measuring cups and spoons (eyeballing never works with cheesecake)
That’s it! No fancy gadgets needed – just basic tools for maximum deliciousness.
How to Make No-Bake Oreo Cheesecake Bars
Alright, let’s get to the fun part! Making these no-bake Oreo cheesecake bars is as easy as 1-2-3-4 (literally, there are four simple steps). I’ll walk you through each one with all my best tips – the same ones I’ve perfected over countless batches!
Step 1: Prepare the Crust
First things first – line your 8×8-inch pan with parchment paper, leaving some overhang on the sides. This little trick will save you so much frustration later when it’s time to slice! Now, take those 36 Oreos (yes, all of them) and crush them into fine crumbs. I use a food processor when I’m feeling fancy, but a ziplock bag and rolling pin work just as well (and can be oddly satisfying after a long day). Mix the crumbs with melted butter until it looks like wet sand – you’ll know it’s right when you can squeeze a handful and it holds its shape. Press this firmly into your prepared pan – I mean really press it! Use the bottom of a cup to get it nice and compact. This sturdy base is what makes the bars sliceable later.
Step 2: Make the Cheesecake Filling
Now for the creamy magic! In a large bowl, beat your softened cream cheese until it’s completely smooth – no lumps allowed! This is why soft cream cheese is so important (take it from me, cold cream cheese equals lumpy filling). Add the sugar and vanilla, and keep beating until everything is perfectly combined and slightly fluffy. The mixture should look like the creamiest frosting you’ve ever seen. I always stop to taste-test here (just a tiny spoonful – quality control, you know?).
Step 3: Fold in Whipped Cream and Oreos
Here’s where things get extra dreamy. In a separate bowl, whip that cold heavy cream to stiff peaks – it should hold its shape when you lift the beaters. Now, gently fold the whipped cream into your cream cheese mixture. I say “fold” because we want to keep all that air we just whipped in! Once that’s combined, stir in your chopped Oreos – don’t overmix, we want those delicious cookie chunks to stay intact. Pour this heavenly mixture over your prepared crust and smooth the top.

Step 4: Chill and Serve
Patience time! Pop your creation in the fridge for at least 4 hours, though overnight is even better for perfect sliceable bars. When it’s time to serve, use the parchment paper to lift the whole thing out of the pan (this is why we left those edges!). For clean cuts, I run my knife under hot water and wipe it between slices. Top with extra crushed Oreos if you’re feeling fancy – I always am!
Tips for Perfect No-Bake Oreo Cheesecake Bars
After making these bars more times than I can count, I’ve picked up some foolproof tricks that guarantee perfection every single time:
- Keep everything cold – Chill your mixing bowl and beaters before whipping the cream. Cold cream whips up faster and holds its shape better!
- Scrape, scrape, scrape – That sneaky cream cheese loves to hide on the sides of the bowl. Stop mixing frequently to scrape down the sides for perfectly smooth filling.
- Press that crust! – Really pack the Oreo crumbs into the pan – I use the bottom of a measuring cup to get it super compact.
- Garnish like a pro – Right before serving, sprinkle extra crushed Oreos on top for that bakery-worthy finish.
Follow these simple tips, and you’ll have bars so good, people will think you bought them from a fancy dessert shop!
Ingredient Substitutions and Variations
Want to mix things up? Here are my favorite twists on these no-bake Oreo cheesecake bars:
- Gluten-free version: Swap regular Oreos for gluten-free chocolate sandwich cookies – they work just as well!
- Lighter option: Reduced-fat cream cheese works in a pinch, but expect a slightly softer texture (I still prefer full-fat for that classic richness).
- Mint lovers: Add 1/4 tsp peppermint extract to the filling for a refreshing twist – perfect for holidays!
- Cookie swap: Try golden Oreos for a vanilla version – just reduce the butter slightly since they’re less absorbent.
The beauty? You can customize these bars to your taste while keeping that irresistible no-bake convenience!
Serving and Storage
Here’s the best part – digging in! These no-bake Oreo cheesecake bars taste best straight from the fridge, nice and chilled. For special occasions, I love drizzling melted chocolate over the top or adding a dollop of whipped cream (because why not?). Leftovers? They keep beautifully in an airtight container in the fridge for up to 5 days – if they last that long! Pro tip: Layer parchment between bars if stacking to prevent sticking.
Nutrition Information
Just to keep things real – these nutrition facts are estimates (because who actually eats just one bar?). Each delicious serving contains:
- 320 calories
- 21g fat (11g saturated)
- 30g carbs
- 22g sugar
- 4g protein
Hey, it’s dessert – worth every indulgent bite if you ask me! Remember, values may vary slightly based on specific ingredients used.
Frequently Asked Questions
Over the years, I’ve gotten all sorts of questions about these no-bake Oreo cheesecake bars – here are the ones that come up most often!
Can I freeze these bars?
Absolutely! These freeze beautifully for up to 1 month. I wrap individual bars tightly in plastic wrap, then pop them in a freezer bag. Thaw in the fridge overnight when you’re ready to enjoy. The texture stays perfect – just like fresh!
Why is my filling runny?
Oh honey, I’ve been there! Usually it means the cream wasn’t whipped enough (it needs stiff peaks) or the cream cheese wasn’t fully softened before mixing. Another culprit? Not chilling long enough – those 4 hours are non-negotiable for firm bars!
Can I use a different cookie?
Of course! Any sandwich cookie works, but adjust the butter slightly – some cookies absorb more than others. Start with 2 tbsp butter for the crust and add more until it holds together when squeezed. My favorite alternative? Those golden Oreos with vanilla filling!
How do I get clean slices?
Here’s my secret: run your knife under hot water and wipe it clean between each cut. Works like a charm every time! Also make sure your bars are fully chilled – patience pays off with picture-perfect slices.
For more delicious recipes and inspiration, check out our Pinterest page!
Print
20-Minute No-Bake Oreo Cheesecake Bars You’ll Love
- Total Time: 4 hours 20 minutes
- Yield: 12 bars 1x
- Diet: Vegetarian
Description
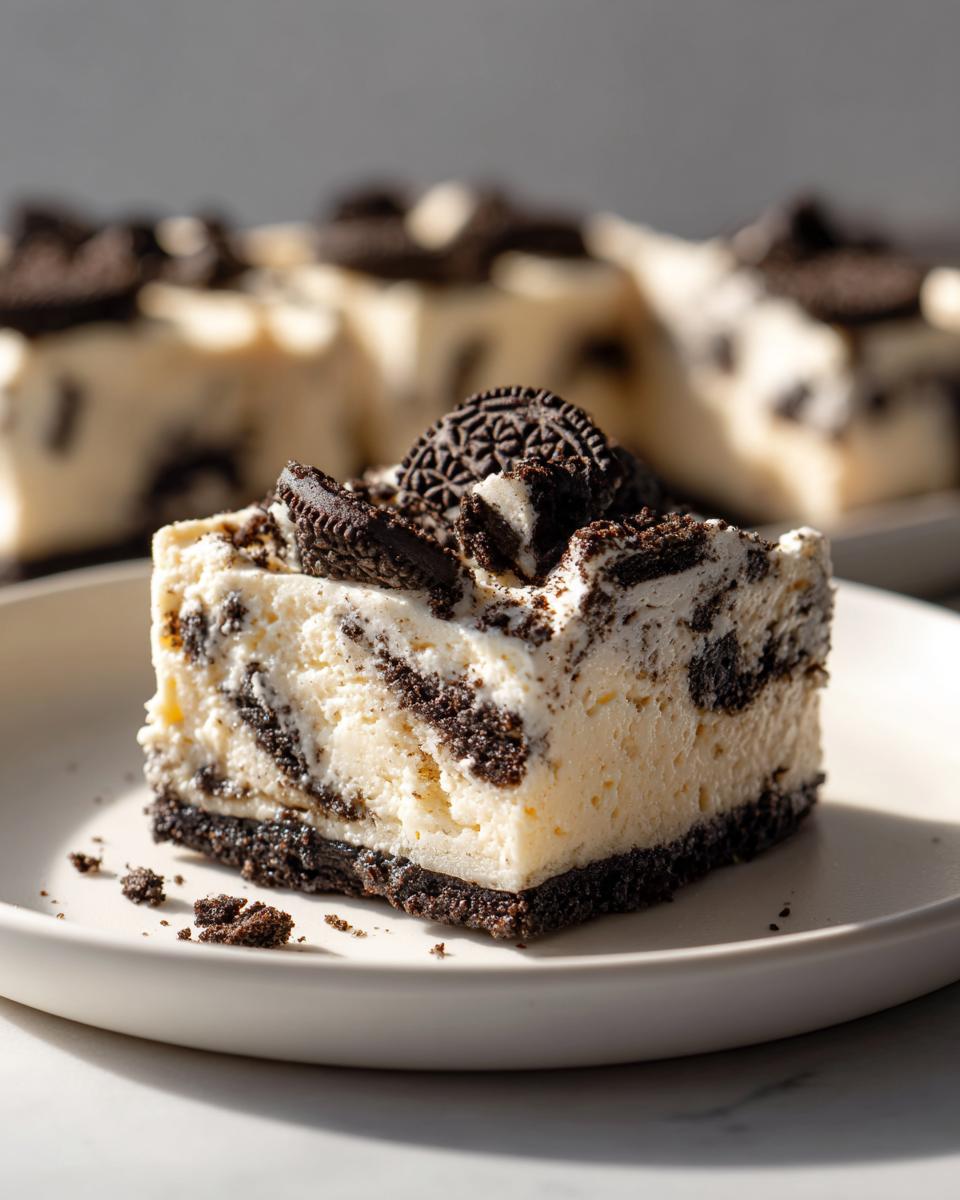
No-bake Oreo cheesecake bars combine crushed Oreos with creamy cheesecake filling for an easy dessert.
Ingredients
- 36 Oreo cookies
- 1/4 cup melted butter
- 16 oz cream cheese, softened
- 1/2 cup granulated sugar
- 2 tsp vanilla extract
- 1 cup heavy whipping cream
- 12 Oreo cookies, chopped
Instructions
- Line an 8×8-inch pan with parchment paper.
- Crush 36 Oreos and mix with melted butter.
- Press mixture into pan to form crust.
- Beat cream cheese, sugar, and vanilla until smooth.
- Whip heavy cream to stiff peaks.
- Fold whipped cream into cream cheese mixture.
- Stir in chopped Oreos.
- Spread filling over crust.
- Refrigerate 4 hours or overnight.
- Cut into bars and serve.
Notes
- Use full-fat cream cheese for best texture.
- Chilling time is essential for firm bars.
- Garnish with extra crushed Oreos before serving.
- Prep Time: 20 minutes
- Cook Time: 0 minutes
- Category: Dessert
- Method: No-Bake
- Cuisine: American
Nutrition
- Serving Size: 1 bar
- Calories: 320
- Sugar: 22g
- Sodium: 280mg
- Fat: 21g
- Saturated Fat: 11g
- Unsaturated Fat: 8g
- Trans Fat: 0g
- Carbohydrates: 30g
- Fiber: 1g
- Protein: 4g
- Cholesterol: 45mg
Keywords: no-bake cheesecake, Oreo dessert, easy cheesecake bars