This decadent Reese’s Chocolate Peanut Butter Cup Earthquake Cake is the ultimate dessert for chocolate and peanut butter lovers. With its signature “cracked” appearance and layers of rich flavors, this show-stopping cake combines the beloved taste of Reese’s peanut butter cups with a moist chocolate base and creamy peanut butter frosting.
Why You’ll Love This Recipe
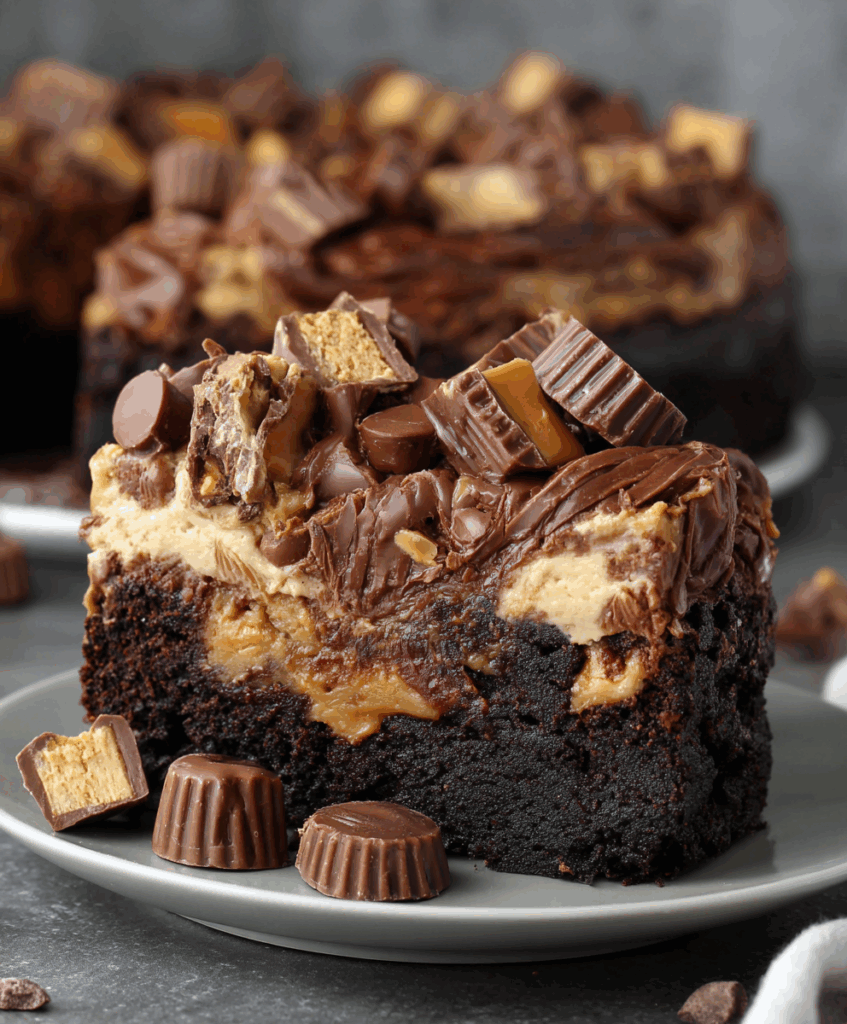
This Reese’s Chocolate Peanut Butter Cup Earthquake Cake delivers everything you crave in a dessert and more. The name “earthquake cake” comes from the dramatic cracks that form on the surface during baking, creating a rustic, homemade appearance that’s both charming and delicious. The combination of rich dark chocolate cake, creamy peanut butter elements, and chunks of actual Reese’s cups creates a flavor explosion in every bite.
What makes this recipe truly special is its perfect balance of textures – from the tender, moist cake base to the smooth cream cheese and peanut butter layers, topped with melted chocolate chips and candy pieces. It’s an impressive dessert that looks complicated but is surprisingly simple to make, making it perfect for both novice bakers and experienced home cooks. Plus, it serves a crowd, making it ideal for parties, potlucks, or family gatherings.
Ingredients You’ll Need

For the Cake Base:
- 1 box dark chocolate fudge cake mix
- Ingredients required on the box (usually oil, eggs, water)
For the Peanut Butter Cream Layer:
- 8 oz cream cheese, softened
- ½ cup unsalted butter, softened
- ½ cup creamy peanut butter
- 1 tsp vanilla extract
- 4 cups powdered sugar
For the Toppings:
- ½ cup chocolate chips (milk or semi-sweet)
- 1 cup mini Reese’s peanut butter cups, halved
- Vanilla ice cream, for serving (optional)
How to Make Reese’s Chocolate Peanut Butter Cup Earthquake Cake
Step-by-Step Instructions
Step 1: Prepare Your Kitchen Preheat your oven to 350°F (175°C). Grease a 9×13-inch baking dish with butter or cooking spray, then lightly dust with cocoa powder to prevent sticking and enhance the chocolate flavor.
Step 2: Make the Cake Batter In a large mixing bowl, prepare the dark chocolate fudge cake mix according to the package directions, combining the cake mix with the required oil, eggs, and water. Mix until smooth and well combined, ensuring no lumps remain.
Step 3: Create the Peanut Butter Cream Layer In a separate large bowl, beat the softened cream cheese and butter together using an electric mixer until light and fluffy, about 2-3 minutes. Add the creamy peanut butter and vanilla extract, mixing until well incorporated. Gradually add the powdered sugar, one cup at a time, beating on low speed initially to prevent a sugar cloud, then increasing to medium-high speed until the mixture is smooth and creamy.
Step 4: Assemble the Cake Pour the prepared chocolate cake batter into your greased baking dish, spreading it evenly with a spatula. Using a large spoon or ice cream scoop, drop dollops of the peanut butter cream mixture over the surface of the cake batter. Don’t worry about making it perfect – the rustic, uneven distribution adds to the earthquake effect.
Step 5: Add the Toppings Sprinkle the chocolate chips evenly over the surface, followed by the halved mini Reese’s peanut butter cups. Gently press the toppings into the surface to help them adhere during baking.
Step 6: Bake to Perfection Place the cake in the preheated oven and bake for 35-45 minutes, or until the edges are set and the center still has a slight jiggle. The surface should develop characteristic cracks – this is exactly what you want for an authentic earthquake cake appearance. A toothpick inserted into the cake portion should come out with just a few moist crumbs.
Step 7: Cool and Serve Allow the cake to cool in the pan for at least 15-20 minutes before serving. The cake can be served warm for a gooey texture or completely cooled for cleaner slices. Serve with vanilla ice cream if desired.
Helpful Tips
Room Temperature Ingredients: Ensure your cream cheese and butter are properly softened before mixing. This prevents lumps and creates a smoother cream layer. If you’re short on time, cut the cream cheese into small cubes and microwave for 10-15 seconds.
Don’t Overmix: When combining the peanut butter cream ingredients, mix just until smooth. Overmixing can cause the mixture to become too thin or separate.
Customize Your Toppings: While mini Reese’s cups are traditional, you can substitute with chopped regular-sized Reese’s cups, peanut butter chips, or even chopped peanut butter cookies for added texture.
Check for Doneness: The cake is done when the chocolate cake portion is set but the center still has a slight wobble. Remember, it will continue to cook slightly from residual heat as it cools.
Details
This Reese’s Chocolate Peanut Butter Cup Earthquake Cake serves 12-15 people generously, making it perfect for large gatherings. The preparation time is approximately 20 minutes, with a baking time of 35-45 minutes. The total time from start to finish is about 1 hour and 15 minutes, including cooling time.
The cake’s signature appearance comes from the way the peanut butter cream layer creates pockets and cracks as it bakes alongside the chocolate cake base. This natural “earthquake” effect gives the dessert its distinctive rustic charm and ensures that every slice has a perfect distribution of flavors and textures.
Notes
Cake Mix Variations: While dark chocolate fudge cake mix provides the richest flavor, you can substitute with regular chocolate or devil’s food cake mix if preferred. The key is using a chocolate base that will complement the peanut butter elements.
Peanut Butter Selection: Creamy peanut butter works best for the smooth cream layer, but if you prefer texture, you can use crunchy peanut butter for added interest.
Make-Ahead Option: This cake actually improves in flavor after sitting overnight, as the flavors meld together. Cover and refrigerate, then bring to room temperature before serving for the best texture.
Dietary Modifications: For a slightly lighter version, you can substitute half the butter with additional cream cheese, though this will change the texture slightly.
Frequently Asked Questions
Q: Can I make this cake ahead of time? A: Absolutely! This Reese’s Chocolate Peanut Butter Cup Earthquake Cake can be made up to 2 days in advance. In fact, many people prefer the flavor after it’s had time to set and the flavors meld together.
Q: Why is my cream layer too thin? A: This usually happens when the cream cheese and butter aren’t properly softened, or if the mixture gets too warm during mixing. Make sure ingredients are at room temperature but not warm, and avoid overmixing.
Q: Can I freeze this cake? A: Yes, this cake freezes well for up to 3 months. Wrap individual slices in plastic wrap and store in freezer bags. Thaw at room temperature for best results.
Q: What if I don’t have mini Reese’s cups? A: You can chop regular-sized Reese’s peanut butter cups into smaller pieces, use peanut butter chips, or even substitute with chopped peanut butter cookies.
Q: Is it normal for the cake to look cracked and uneven? A: Yes! The cracked, uneven appearance is exactly what makes this an “earthquake” cake. The rustic look is part of its charm and indicates it was made correctly.
Storage Instructions
Store your Reese’s Chocolate Peanut Butter Cup Earthquake Cake covered in the refrigerator for up to 5 days. The cake can be served directly from the refrigerator for a firmer texture, or brought to room temperature for 30 minutes for a softer, more indulgent experience.
For longer storage, wrap individual slices tightly in plastic wrap and freeze for up to 3 months. When ready to enjoy, thaw slices at room temperature or microwave for 15-20 seconds for a warm, gooey treat.
If storing at room temperature, the cake should be consumed within 2 days and kept in a cool, dry place away from direct sunlight.
Conclusion
This Reese’s Chocolate Peanut Butter Cup Earthquake Cake is more than just a dessert – it’s an experience that brings together the beloved flavors of chocolate and peanut butter in the most indulgent way possible. With its impressive appearance, rich flavors, and surprisingly simple preparation, this cake is sure to become a favorite in your recipe collection.
Whether you’re celebrating a special occasion, bringing a dessert to share, or simply treating yourself to something extraordinary, this earthquake cake delivers on every level. The combination of moist chocolate cake, creamy peanut butter elements, and chunks of Reese’s candy creates a dessert that’s both nostalgic and sophisticated.
So gather your ingredients, preheat that oven, and get ready to create a dessert that will have everyone asking for the recipe. This Reese’s Chocolate Peanut Butter Cup Earthquake Cake proves that sometimes the most impressive desserts are the ones that embrace their imperfections and let their flavors do the talking.