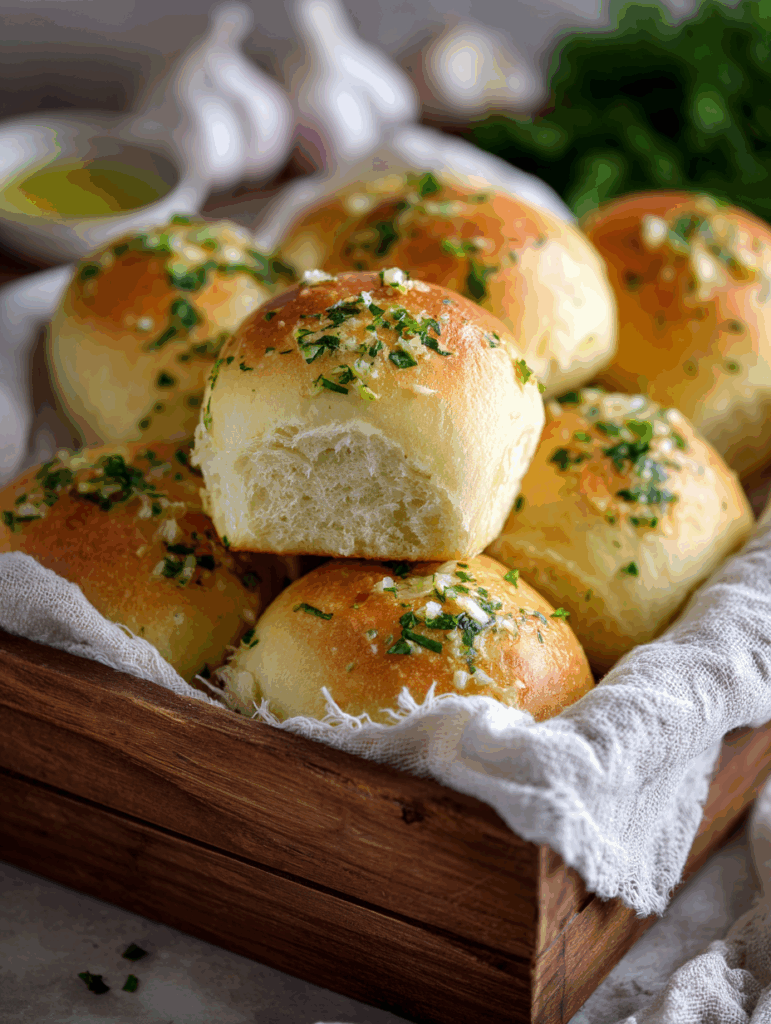
Transform your dinner table with these irresistibly soft and buttery garlic bread rolls. This garlic bread rolls recipe combines the comfort of freshly baked bread with the aromatic flavors of garlic and herbs, creating the perfect side dish for any meal.
Why You’ll Love This Recipe
These homemade garlic bread rolls offer the perfect balance of fluffy texture and bold garlic flavor that will have your family asking for seconds. Unlike store-bought alternatives, this garlic bread rolls recipe allows you to control the ingredients and freshness, resulting in rolls that are warm, aromatic, and incredibly satisfying. The combination of soft, pillowy dough and rich garlic butter creates an irresistible contrast that pairs beautifully with pasta dishes, soups, or enjoyed on their own as a snack.
The recipe is surprisingly approachable for home bakers of all skill levels, requiring basic ingredients you likely already have in your pantry. The process is forgiving, and the results are consistently impressive, making these garlic bread rolls perfect for both casual family dinners and special occasions.
Ingredients You’ll Need

Dough:
- 3 cups all-purpose flour
- 2 1/4 teaspoons instant yeast
- 1 tablespoon granulated sugar
- 1 teaspoon salt
- 3/4 cup warm milk
- 1/4 cup warm water
- 2 tablespoons olive oil
Garlic Butter Topping:
- 4 tablespoons unsalted butter, melted
- 3 cloves garlic, minced
- 1 tablespoon chopped fresh parsley
- 1/4 teaspoon garlic powder
- 1/4 cup grated Parmesan cheese (optional)
How to Make Garlic Bread Rolls
Step-by-Step Instructions:
Step 1: Prepare the Dough In a large mixing bowl, combine the flour, instant yeast, sugar, and salt. Whisk together to distribute the ingredients evenly. In a separate measuring cup, combine the warm milk, warm water, and olive oil. The liquid should feel comfortably warm to the touch, not hot, as excessive heat can kill the yeast.
Step 2: Mix and Knead Pour the liquid mixture into the flour mixture and stir with a wooden spoon until a shaggy dough forms. Turn the dough onto a lightly floured surface and knead for 8-10 minutes until the dough becomes smooth, elastic, and slightly tacky but not sticky. Alternatively, use a stand mixer with a dough hook for 5-6 minutes on medium speed.
Step 3: First Rise Place the kneaded dough in a lightly oiled bowl, turning to coat all sides. Cover with a damp kitchen towel or plastic wrap and let rise in a warm, draft-free location for 1 to 1.5 hours, or until doubled in size.
Step 4: Shape the Rolls Punch down the risen dough to release air bubbles. Divide the dough into 12 equal portions using a kitchen scale for consistency, or eyeball it for rustic variation. Shape each portion into a smooth ball by tucking the edges underneath and rolling between your palms.
Step 5: Second Rise Arrange the shaped rolls on a parchment-lined baking sheet, spacing them about 2 inches apart. Cover with a kitchen towel and let rise for 30-45 minutes until puffy and nearly doubled.
Step 6: Prepare Garlic Butter While the rolls undergo their second rise, prepare the garlic butter topping. In a small bowl, combine the melted butter, minced garlic, chopped parsley, and garlic powder. Mix thoroughly and set aside.
Step 7: Bake Preheat your oven to 375°F (190°C). Brush the tops of the risen rolls generously with the garlic butter mixture, reserving some for after baking. Bake for 18-22 minutes until the tops are golden brown and the internal temperature reaches 190°F (88°C).
Step 8: Final Touch Remove the rolls from the oven and immediately brush with the remaining garlic butter. Sprinkle with Parmesan cheese if using, and serve warm.
Helpful Tips
Ensure your liquids are at the correct temperature by testing with a kitchen thermometer or your wrist. The ideal temperature range is 100-110°F (38-43°C). If the liquid feels too hot against your skin, let it cool slightly before adding to the yeast.
For the best texture, avoid adding too much flour during kneading. The dough should remain slightly tacky to achieve soft, tender rolls. If the dough is too sticky to handle, add flour one tablespoon at a time.
Create an ideal rising environment by placing the covered bowl in a slightly warm oven (turned off) or near a sunny window. Consistent warmth encourages proper yeast activity and reduces rising time.
Fresh garlic provides the best flavor, but if you’re short on time, you can substitute with 1/2 teaspoon of garlic powder mixed directly into the butter. However, fresh garlic creates a more vibrant taste that truly elevates this garlic bread rolls recipe.
Details
Prep Time: 20 minutes
Rising Time: 2 hours (total)
Baking Time: 18-22 minutes
Total Time: 2 hours 40 minutes
Servings: 12 rolls
Difficulty: Intermediate
Notes
The dough can be prepared up to 24 hours in advance and stored in the refrigerator after the first rise. Simply remove it from the fridge, shape the rolls, and allow for an extended second rise of 45-60 minutes as the cold dough comes to room temperature.
For a richer flavor, substitute buttermilk for regular milk, which adds a subtle tang that complements the garlic beautifully. You can also experiment with different herbs such as rosemary, thyme, or oregano in place of parsley.
If you prefer a more intense garlic flavor, increase the minced garlic to 4 cloves and add a pinch of salt to the garlic butter mixture to help release the garlic’s oils.
Frequently Asked Questions
Can I make these rolls without a stand mixer? Absolutely! Hand kneading works perfectly for this garlic bread rolls recipe. Plan for 8-10 minutes of kneading to develop the gluten properly.
What if my dough doesn’t rise? Check that your yeast is still active by proofing it in warm water with a pinch of sugar before using. If the mixture doesn’t foam after 5 minutes, your yeast may be expired. Also ensure your rising environment is warm enough, ideally between 75-80°F (24-27°C).
Can I freeze the dough? Yes, you can freeze the shaped rolls before the second rise. Place them on a baking sheet, freeze until solid, then transfer to a freezer bag. When ready to bake, thaw overnight in the refrigerator, then allow them to rise before baking.
How do I know when the rolls are fully baked? The rolls should be golden brown on top and sound hollow when tapped on the bottom. An instant-read thermometer inserted into the center should read 190°F (88°C).
Storage Instructions
Store leftover garlic bread rolls in an airtight container at room temperature for up to 3 days. For longer storage, wrap individually in plastic wrap and freeze for up to 3 months.
To reheat, wrap rolls in foil and warm in a 350°F (175°C) oven for 5-7 minutes, or microwave individual rolls for 15-20 seconds. For a crispy exterior, reheat unwrapped in a toaster oven for 2-3 minutes.
Day-old rolls can be revitalized by brushing with additional garlic butter and warming in the oven, which refreshes both their texture and flavor.
Conclusion
This garlic bread rolls recipe delivers bakery-quality results in your home kitchen, combining the satisfaction of homemade bread with the irresistible appeal of garlic butter. The soft, pillowy texture paired with aromatic garlic and herbs creates a side dish that transforms any meal into something special.
Whether you’re serving these alongside a hearty pasta dinner, using them to soak up soup, or enjoying them as a savory snack, these garlic bread rolls are sure to become a household favorite. The recipe’s flexibility allows for personal touches and variations, making it a valuable addition to your baking repertoire.
With proper technique and attention to detail, you’ll consistently produce rolls that are golden, fragrant, and utterly delicious. The combination of simple ingredients and traditional bread-making methods ensures that each batch captures the comforting essence of homemade bread with an irresistible garlic twist.