Why You’ll Love This Recipe:
This Cherry Cheese Danish combines the flaky, buttery perfection of puff pastry with a rich, creamy cheese filling and sweet-tart cherry topping. It’s the perfect balance of textures and flavors that will make your kitchen smell like a European bakery. Whether you’re serving brunch guests or treating yourself to a special breakfast, this Cherry Cheese Danish delivers bakery-quality results with minimal effort. The recipe is foolproof enough for beginners yet impressive enough for experienced bakers, making it your go-to choice for any occasion that calls for something special.
Ingredients You’ll Need:
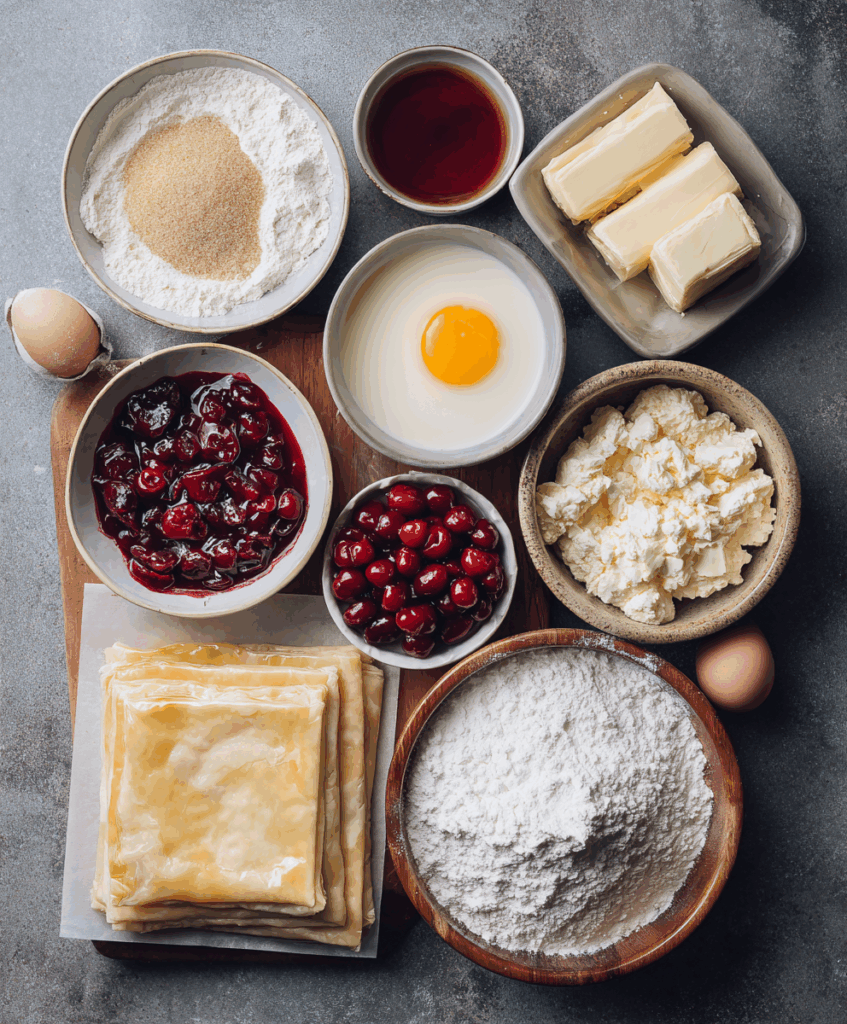
- 1 sheet puff pastry (thawed)
- 1 cup cherry pie filling (canned)
- 8 oz cream cheese (softened)
- 1/4 cup granulated sugar
- 1 tsp vanilla extract
- 1 egg (for egg wash)
How to Make Cherry Cheese Danish:
Step-by-Step Instructions:
- Prepare Your Workspace: Preheat your oven to 400°F (200°C). Line a baking sheet with parchment paper and lightly flour your work surface.
- Make the Cream Cheese Filling: In a medium bowl, beat the softened cream cheese until smooth and fluffy. Add the granulated sugar and vanilla extract, mixing until well combined and no lumps remain.
- Prepare the Puff Pastry: Roll out the thawed puff pastry sheet on your floured surface to smooth out any creases. Cut the pastry into 6-8 equal squares, depending on your desired size.
- Shape the Danish: For each square, make diagonal cuts from each corner toward the center, stopping about 1 inch from the middle. This creates 8 triangular flaps around a center square.
- Add the Filling: Place about 1-2 tablespoons of cream cheese mixture in the center of each pastry square. Top with a spoonful of cherry pie filling.
- Fold the Pastry: Take alternating flaps and fold them over the filling, creating a pinwheel pattern. Press gently to seal.
- Apply Egg Wash: Beat the egg and brush it over the exposed pastry surfaces for a golden, glossy finish.
- Bake: Place the Danish on your prepared baking sheet and bake for 15-20 minutes, or until the pastry is golden brown and puffed.
- Cool and Serve: Allow the Cherry Cheese Danish to cool for 5 minutes before serving warm.
Helpful Tips:
- Thaw Properly: Remove puff pastry from the freezer 30-40 minutes before use. It should be pliable but still cold to the touch.
- Room Temperature Cream Cheese: Ensure your cream cheese is fully softened for a smooth, lump-free filling. Leave it out for 1-2 hours or microwave for 10-15 seconds.
- Don’t Overfill: Less is more when it comes to filling. Overfilling can cause the pastry to become soggy or burst during baking.
- Work Quickly: Puff pastry works best when kept cold. If it becomes too warm, refrigerate for 10 minutes before continuing.
- Even Spacing: Leave space between each Danish on the baking sheet to allow for proper puffing and browning.
Details:
Prep Time: 20 minutes
Cook Time: 15-20 minutes
Total Time: 35-40 minutes
Servings: 6-8 Danish
Difficulty: Easy
Cuisine: European-inspired
Course: Breakfast, Brunch, Dessert
Notes:

- You can substitute cherry pie filling with other fruit fillings like blueberry, apple, or strawberry for variety.
- For a more decadent version, add a drizzle of simple glaze made from powdered sugar and milk after cooling.
- Fresh cherries can be used when in season – simply cook them with a little sugar and cornstarch until thickened.
- These Danish are best served warm but can be reheated in a 350°F oven for 5 minutes to restore crispness.
Frequently Asked Questions:
Q: Can I make these Cherry Cheese Danish ahead of time? A: Yes! You can assemble the Danish up to 24 hours ahead and refrigerate them covered. Brush with egg wash and bake when ready to serve.
Q: What if I don’t have cherry pie filling? A: You can use any fruit preserve, jam, or make your own cherry compote by cooking fresh or frozen cherries with sugar until thickened.
Q: Can I freeze unbaked Danish? A: Absolutely! Assemble the Danish, place on a baking sheet, and freeze until solid. Transfer to freezer bags and store for up to 3 months. Bake directly from frozen, adding 5-10 minutes to the baking time.
Q: Why did my pastry become soggy? A: This usually happens from overfilling or using filling that’s too wet. Drain excess liquid from cherry filling and don’t overfill the pastry.
Q: Can I use homemade puff pastry? A: Of course! Homemade puff pastry will work beautifully in this recipe. Just ensure it’s properly chilled before use.
Storage Instructions:
Store leftover Cherry Cheese Danish in an airtight container in the refrigerator for up to 3 days. For best results, reheat in a 350°F oven for 5-7 minutes to restore the pastry’s crispness. Avoid microwaving as it can make the pastry soggy.
For longer storage, wrap individual Danish in plastic wrap and freeze for up to 3 months. Thaw overnight in the refrigerator and reheat in the oven before serving.
Conclusion:
This Cherry Cheese Danish recipe proves that impressive bakery-style pastries can be made at home with simple ingredients and techniques. The combination of flaky puff pastry, creamy cheese filling, and sweet cherry topping creates a truly irresistible treat that’s perfect for any time you want to add a touch of elegance to your table. Whether you’re hosting a brunch, surprising someone special, or simply indulging in a homemade pastry, this Cherry Cheese Danish delivers consistent, delicious results every time. The recipe’s versatility also means you can experiment with different fruit fillings and make it your own signature creation.