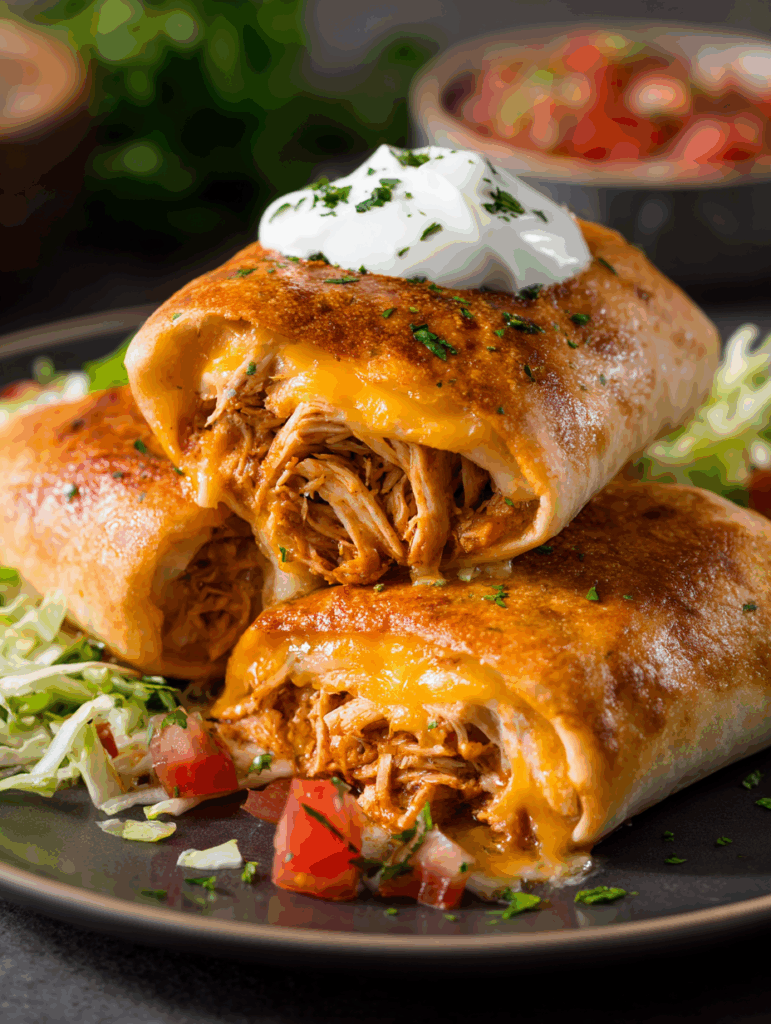
Transform your weeknight dinner routine with this incredible Baked Chicken Chimichangas Recipe that delivers all the crispy, cheesy goodness of traditional deep-fried chimichangas without the excess oil. These golden, baked beauties are packed with seasoned shredded chicken, melted cheese, and zesty flavors that will have your family asking for seconds.
Why You’ll Love This Recipe
This Baked Chicken Chimichangas Recipe is a game-changer for busy home cooks who want restaurant-quality Mexican food without the hassle. The baking method creates a perfectly crispy exterior while keeping the filling hot and melty inside. You’ll love how easy these are to customize with your favorite ingredients, and they’re significantly healthier than their deep-fried counterparts. Plus, they freeze beautifully for make-ahead meals, making this recipe a true weeknight hero.
Ingredients You’ll Need

For the Chimichangas:
- 2 cups cooked shredded chicken
- 1 cup shredded cheddar or Monterey Jack cheese
- 1/2 cup salsa (your choice of heat)
- 1/4 cup sour cream
- 1 teaspoon ground cumin
- 1/2 teaspoon chili powder
- 1/2 teaspoon garlic powder
- 1/4 teaspoon salt
- 1/4 teaspoon black pepper
- 4 large flour tortillas
- 2 tablespoons melted butter or olive oil (for brushing)
Optional Toppings:
- Guacamole
- Sour cream
- Salsa
- Chopped cilantro
How to Make Baked Chicken Chimichangas Recipe
Step-by-Step Instructions:
Step 1: Prepare the Oven and Pan Preheat your oven to 425°F (220°C). Line a large baking sheet with parchment paper or lightly grease it with cooking spray.
Step 2: Make the Filling In a large mixing bowl, combine the shredded chicken, cheese, salsa, sour cream, cumin, chili powder, garlic powder, salt, and black pepper. Mix thoroughly until all ingredients are well incorporated and the chicken is evenly coated with the seasonings.
Step 3: Warm the Tortillas Microwave the flour tortillas for 20-30 seconds or warm them in a dry skillet for 10 seconds per side. This makes them more pliable and easier to roll without tearing.
Step 4: Assemble the Chimichangas Place about 1/2 cup of the chicken mixture in the center of each tortilla. Fold in the sides of the tortilla, then roll tightly from the bottom up, ensuring the seam is on the bottom. Place seam-side down on the prepared baking sheet.
Step 5: Brush and Bake Brush the tops and sides of each chimichanga with melted butter or olive oil. This creates that golden, crispy exterior. Bake for 15-20 minutes, or until golden brown and crispy, flipping halfway through for even browning.
Step 6: Serve Let the chimichangas cool for 2-3 minutes before serving. Top with your favorite garnishes and enjoy!
Helpful Tips
Prevent Soggy Bottoms: Make sure your chicken mixture isn’t too wet. Drain any excess liquid from the salsa and sour cream before mixing.
Achieve Maximum Crispiness: Don’t skip brushing with butter or oil – this is essential for that golden, restaurant-style exterior.
Keep Tortillas Flexible: Warm tortillas are crucial for easy rolling. Cold tortillas tend to crack and tear.
Seal Properly: Make sure the seam is tightly sealed and placed face-down on the baking sheet to prevent the filling from leaking out.
Even Cooking: Flip the chimichangas halfway through baking to ensure both sides get beautifully golden and crispy.
Details
Prep Time: 15 minutes
Cook Time: 20 minutes
Total Time: 35 minutes
Servings: 4 chimichangas
Calories: Approximately 380 per chimichanga
This Baked Chicken Chimichangas Recipe serves four people generously and can easily be doubled for larger families or meal prep. The combination of spices creates an authentic Mexican flavor profile that’s not too spicy for kids but satisfying for adults.
Notes
Protein Variations: This recipe works wonderfully with leftover rotisserie chicken, slow-cooker chicken, or even turkey. You can also substitute with cooked ground beef or pork.
Cheese Options: While cheddar and Monterey Jack are classics, feel free to experiment with Mexican cheese blends, pepper jack for extra heat, or even cream cheese for added richness.
Make-Ahead Friendly: Assemble the chimichangas up to 24 hours in advance, cover tightly, and refrigerate until ready to bake. Add an extra 2-3 minutes to the cooking time if baking from cold.
Freezer Instructions: These freeze beautifully! Wrap individually in foil and freeze for up to 3 months. Bake directly from frozen at 375°F for 25-30 minutes.
Frequently Asked Questions
Q: Can I use corn tortillas instead of flour tortillas? A: While flour tortillas work best for this Baked Chicken Chimichangas Recipe due to their flexibility and size, you can use large corn tortillas. Just be extra careful when rolling as they’re more prone to cracking.
Q: How do I prevent the filling from leaking out? A: Make sure not to overfill the tortillas, seal the edges tightly, and always place them seam-side down on the baking sheet. A light brush of water on the edges before sealing can help create a better seal.
Q: Can I make these ahead of time? A: Absolutely! You can assemble the chimichangas up to 24 hours in advance and refrigerate them. You can also freeze them for up to 3 months. Just adjust the cooking time accordingly.
Q: What’s the best way to reheat leftovers? A: For best results, reheat in a 350°F oven for 8-10 minutes to maintain crispiness. The microwave will work but may result in a softer exterior.
Q: Can I add vegetables to the filling? A: Yes! Diced bell peppers, onions, jalapeños, or corn make excellent additions. Just make sure to cook and drain any vegetables first to prevent excess moisture.
Storage Instructions
Refrigerator Storage: Store leftover chimichangas in the refrigerator for up to 3 days in an airtight container. Reheat in the oven at 350°F for 8-10 minutes to restore crispiness.
Freezer Storage: For longer storage, wrap individual chimichangas tightly in aluminum foil and place in a freezer-safe bag. They’ll keep for up to 3 months. Bake directly from frozen, adding 5-10 minutes to the original cooking time.
Reheating Tips: Always reheat in the oven rather than the microwave to maintain that crispy exterior that makes this Baked Chicken Chimichangas Recipe so special.
Conclusion
This Baked Chicken Chimichangas Recipe proves that you don’t need a deep fryer to create restaurant-quality Mexican food at home. With its crispy golden exterior, melty cheese center, and perfectly seasoned chicken filling, these baked beauties deliver on both flavor and convenience. Whether you’re feeding a hungry family on a busy weeknight or meal-prepping for the week ahead, this recipe is sure to become a regular in your dinner rotation. The best part? You can feel good about serving these healthier baked versions without sacrificing any of the delicious taste your family craves. Give this Baked Chicken Chimichangas Recipe a try tonight – your taste buds will thank you!